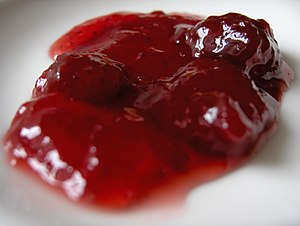
Do you know the difference between preserves and jam? The answer lies in the size of the fruit chunks. Jam is made from crushed fruit pieces. Preserves are made from whole fruit, or at least larger pieces. Also, Preserves can have less sugar, although that depends on the recipe.
For strawberry, I prefer preserves. There is something wonderful about that whole chunk of strawberry on my biscuit. Forget the rest, I just fish out the whole fruit piece. Plus, if you’re the cook, there is less work- you use the fruit whole.
If you’re making strawberry preserves in large quantities to sell to others, learn how investing in commercial refrigeration can help you maintain those preserves longer so you can have fresh products to offer.
Strawberry Preserves
My grandmother made these preserves and sealed them with Parafin wax. This is no longer recommended. This recipe is updated to follow the new USDA safety recommendations.
4 cups strawberries, washed and capped.
1 cup water
4 cups sugar
Sterilized Jars, lids, and rings ( makes 2-3 pints)
- Wash jars in hot water with detergent and rinse well, or wash in the dishwasher. Cover clean jars with water in a canner or large pot and bring to a boil. Boil for 10 minutes. Keep the water simmering to use as a boiling water bath in step 6.
- Prepare the lids and rings according to manufacturers recommendations.
- Combine water and sugar. Cook until it reaches soft ball stage or 235 degrees F on the candy thermometer. (See below for more info on the “soft-ball” stage.)
- Add the strawberries and cook over high heat for 15 minutes. Skim off foam while cooking.
- Put into sterilized jars, leaving approximately ¼ inch of head space (air). Wipe rim and threads with a damp paper towel to remove any sticky sugar residue and seal lids. Tighten lids, but do not over-tighten.
- Place the filled jars into the boiling water bath for 10 minutes. Add more water if needed to completely cover the jars. Put partially filled jars into fridge immediately. Start timing when the water comes to a boil again. At the end of the 10 minute processing time, remove the jars onto a folded towel and leave them undisturbed to cool.
- Inspect the jars to be sure they sealed. As they are cooling you may hear them “pop”. This is a good sound- it means the vacuum has pulled the lid down. Any jars that do not seal should be put in the fridge to use first.
- Make biscuits cause you know you want some!!!
NOTES: “Soft-Ball” stage is reached at 235° F. When a small bit of the syrup is dropped into cold water to cool it down, it will form a soft ball or drop on the bottom of the bowl. You can squish the ball with your fingers, it will be soft. Prior to the soft-ball stage the syrup will just go to the bottom of the bowl making a mess.
For the best results and most accuracy, I recommend that you use both a candy thermometer and the cold water test. It’s also a good idea to test your thermometer’s accuracy by placing it in plain boiling water. At sea level, it should read 212° F. If it reads above or below this number, make the necessary adjustments when cooking your syrup. This is clumsy at first, but after a few times—it’s easy! Enjoy!
You need to keep the Preserves and jars very hot. If you work slowly and are worried that the jars may have cooled too much—not to worry, just put them back into the boiling water and boil for another 10 minutes (keep the jars upright). Be careful to prevent burning. I usually leave the jar in the boiling water or oven until I am ready to fill it.
You do not need pectin (Sure-Jel) for this recipe. You can make larger batches, however, it is best to work with small batches until you have a little experience.

